
In this tutorial we will go over the steps to setup an email account in macmail osx
Before you begin, you will need to the know the following details.
- Email Address
- Password
- Incoming Mail Server Settings
- Outgoing Mail Server Settings
1. Choose Add Account from the File Menu

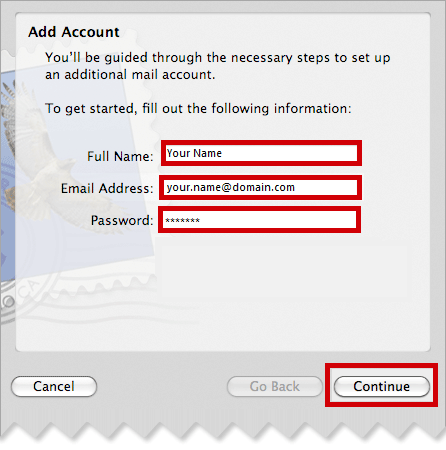
2. Complete the details on the wizard that loads up, and click Continue
| Full Name : | This is the name that you want to appear on the e-mail |
| E-Mail Address : | This is the email address you want replies to come to |
| Password: | This is the password you associated with your mailbox in the control panel |
3. Complete the incoming server Settings and click Continue
Incoming Server Information |
|
|---|---|
| Account Type : | Choose Account Type |
| Description : | An Identifier for that account |
| Incoming Mail Server : | Enter incoming mail server settings here |
| User Name : | This is your full email address as configured in your control panel (eg your.name@domain.com) |
| Password : | This is the password you associated with your mailbox in the control panel |

4. Complete the Outgoing Server Information and click Continue
Outgoing Server Information |
|
|---|---|
| Description : | An Identifier for that account |
| Outgoing Mail Server : | Enter outgoing mail server settings here |
| Use Authentication : | Yes |
| User Name : | This is your full email address as configured in your control panel (eg your.name@domain.com) |
| Password : | This is the password you associated with your mailbox in the control panel |

5. You will then be presented with a summary screen, click Create